The new Delta E comparison puts the numbers, the a*b* chart, the spectral curves and the approval in one place. See it live on November 10.
Quick answer
MatchBox has a new Delta E comparison. It shows how close every lab dip, or every dyelot of a BulkControl job, is to the reference: as numbers in a table, in the a*b* chart with the job's tolerance and color direction, as spectral curves and in a 3D Lab view. For lab dips, you approve or reject right where you compare. The new comparison is live now, and the previous one stays available next to it.
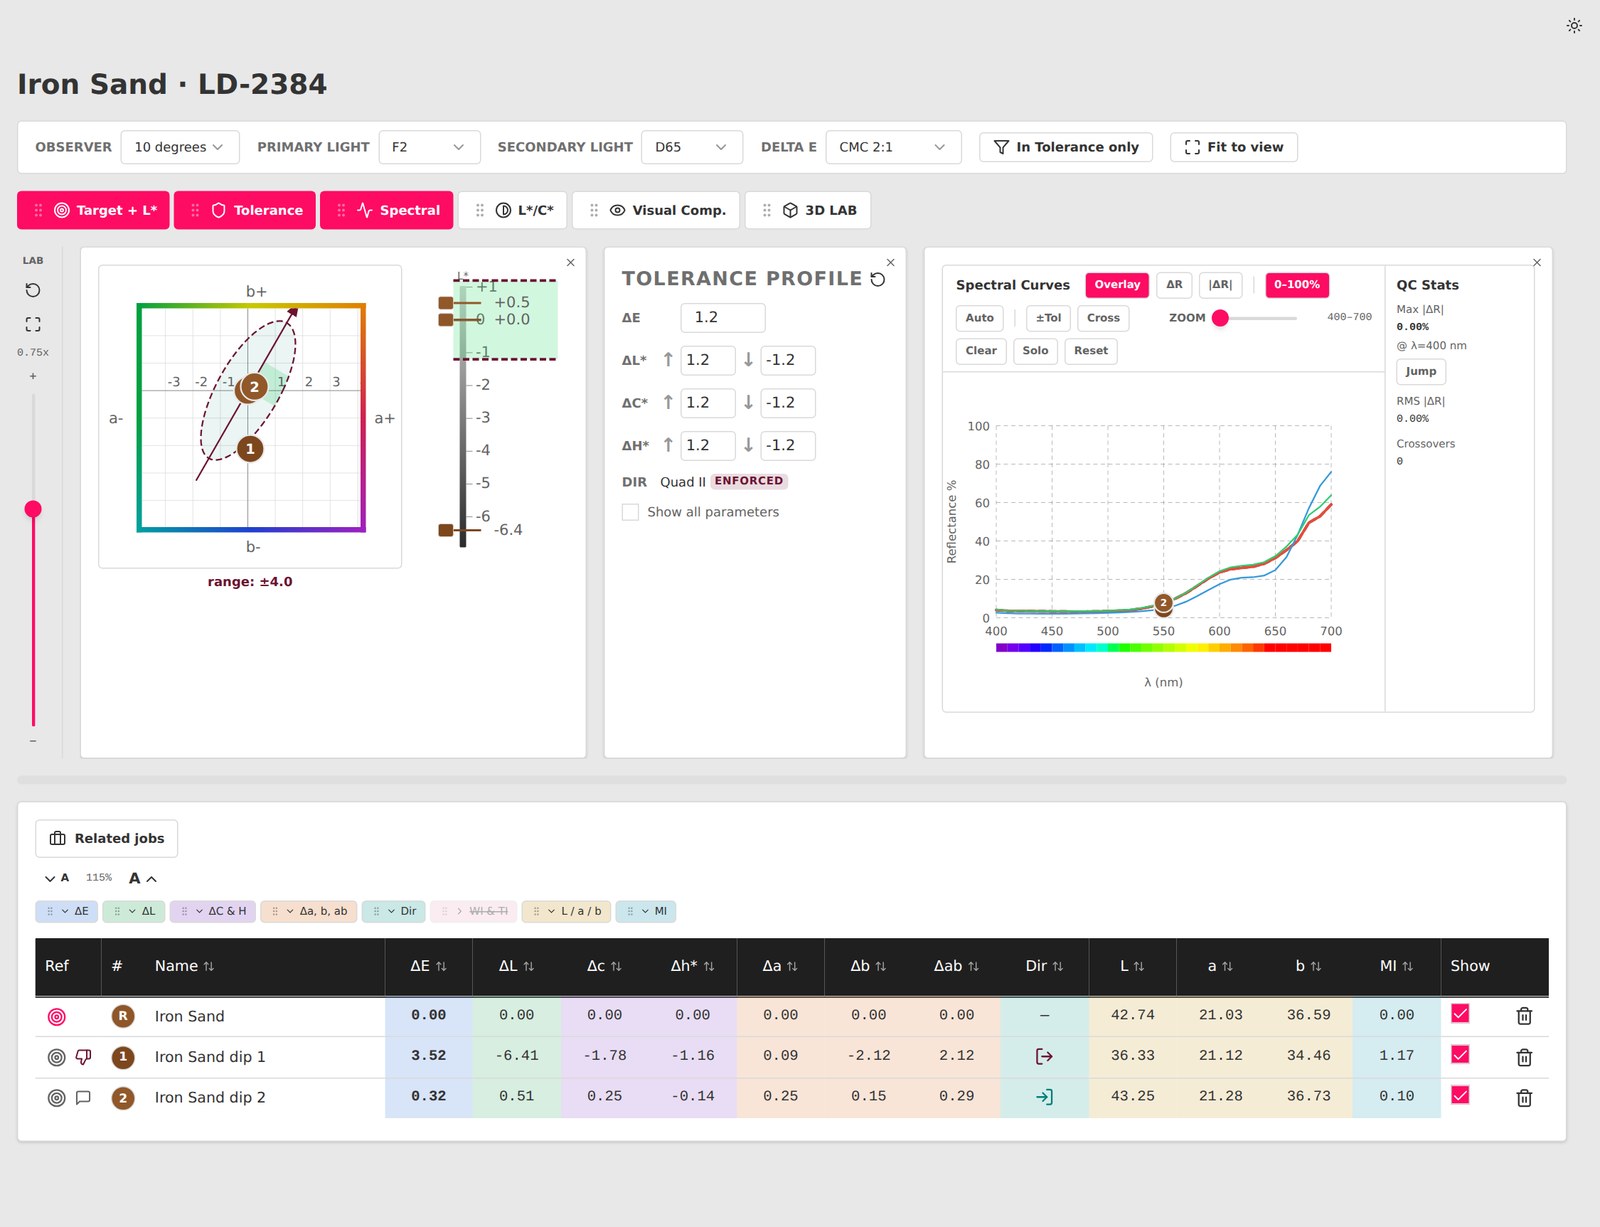
What you see when you open a job
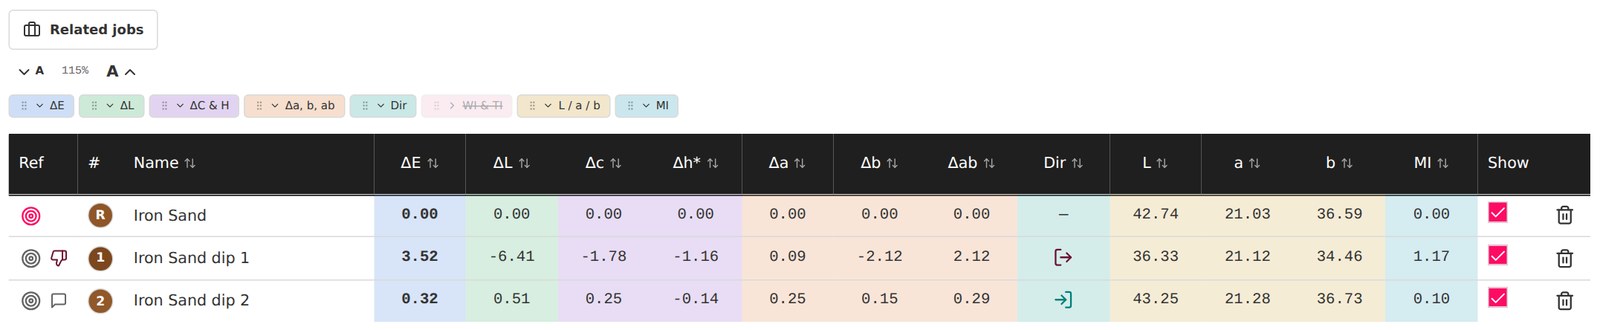
You open the comparison from the job detail panel with the green crosshair button labeled Open DeltaE comparison (new). The reference sits in the row marked R. Every lab dip is numbered in the order it was submitted, and the same number marks it in every chart: the dot labeled 2 in the a*b* chart is always the dip in row 2 of the table.
The bar at the top sets the conditions for every number and every chart:

- Observer: 2 or 10 degrees.
- Primary light: the illuminant the differences are calculated for, for example D65 or F2.
- Secondary light: the second illuminant for the metamerism index.
- Delta E formula: CIE76, CIE94, CIEDE2000, CMC 1:1, CMC 2:1 and their weighted variants.
The defaults come from the job's tolerance profile. Change one, and the table, the charts and the 3D view update immediately.
Tolerance with a direction, not just a radius
A Delta E value tells you how far a dip is from the standard. It does not tell you whether the dip moved in a direction the product can accept. A white that drifts cooler may be fine. The same distance towards yellow is not.
The Target + L* panel shows both. The dashed ring is the job's tolerance, the arrow is the hue direction, and the green area is where a dip is accepted: the tolerance cut down to the color direction the job allows. Next to it, a bar shows each sample's lightness against the reference, with the tolerance as a green band. The Dir column in the table says the same in one symbol: an arrow pointing into the box means inside the allowed direction, an arrow pointing out means outside.
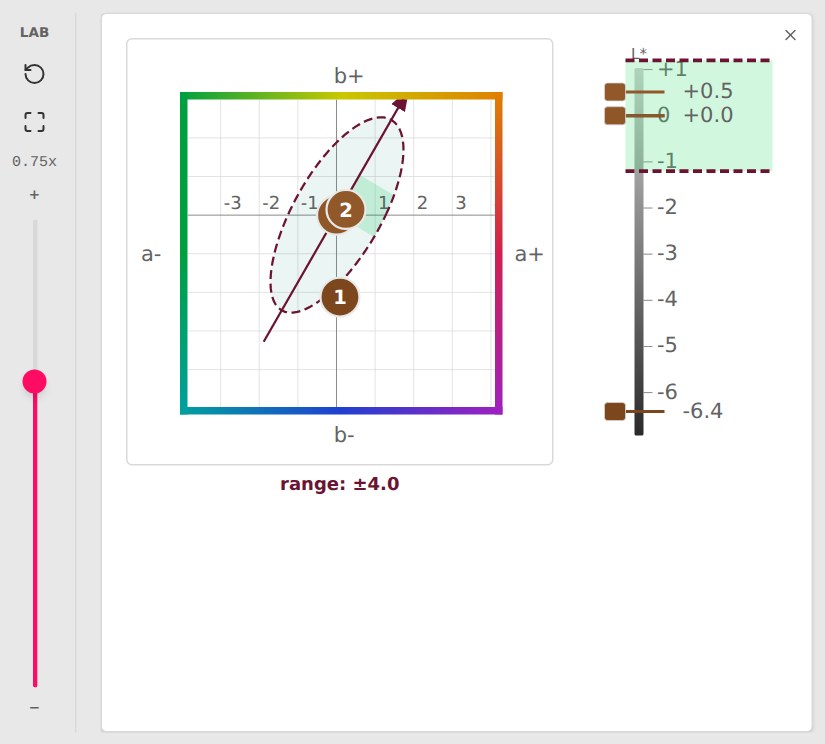
When the job enforces a direction, In Tolerance only treats a dip outside that direction as outside the tolerance and hides it. What stays on screen are the real candidates. The hidden dips remain in the table, greyed out, and return with one click.
Six panels, arranged the way you work
Below the settings bar you switch panels on and off and drag them into the order you need:
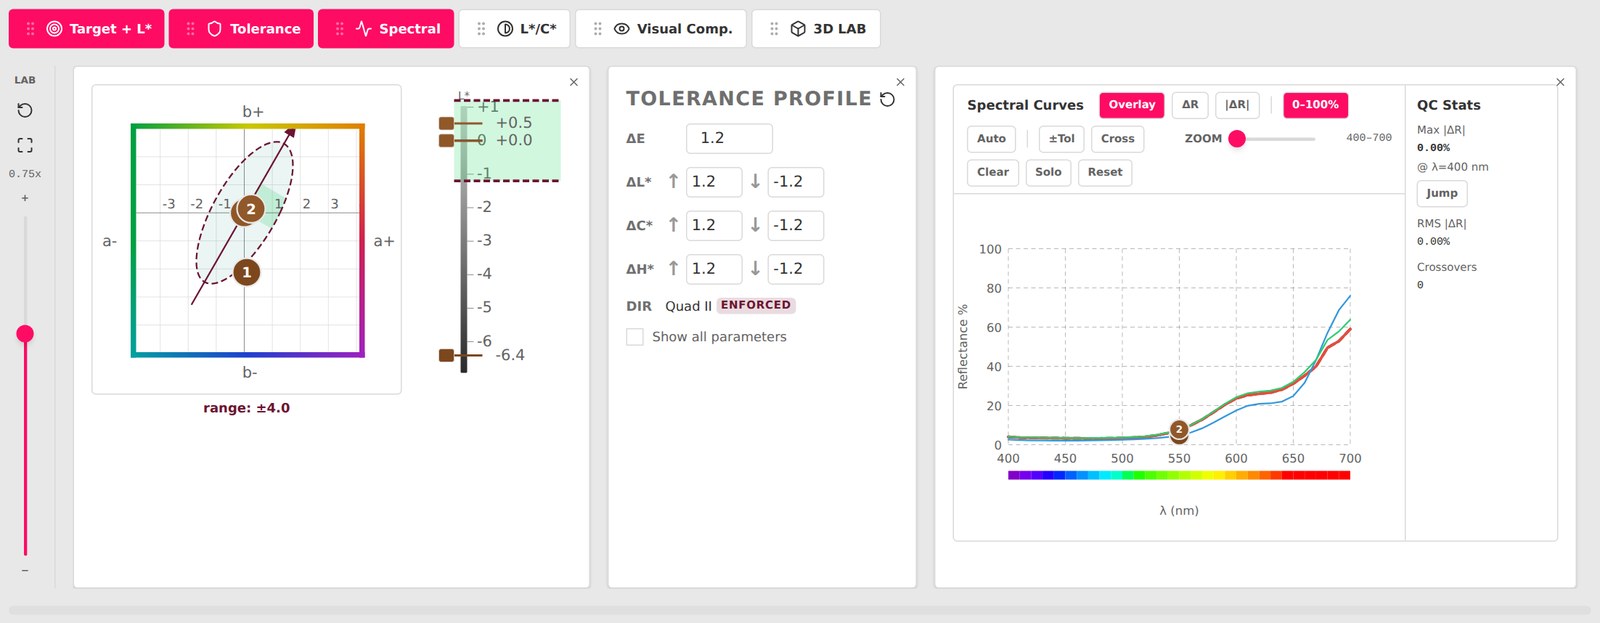
- Target + L*: the a*b* chart with tolerance and approval zone, next to the lightness bar.
- Tolerance: the limits the job was created with: ΔE, upper and lower limits for ΔL*, ΔC* and ΔH*, and the color direction. Type other limits to see what would pass. The job itself stays unchanged.
- Spectral: reflectance curves from 400 to 700 nm, as an overlay or as the difference to the reference, with a tolerance band, crossover points and QC stats for the largest and the average deviation.
- L*/C*: shows whether a dip is too light or too dull rather than the wrong hue.
- Visual Comp.: the colors as patches side by side, the reference first.
- 3D LAB: reference and dips in Lab space, the tolerance as an ellipsoid and the accepted volume inside it.
The comparison remembers your panels, their order, the chart size and the table columns for every job you open.
Last season's approval as a benchmark
Related jobs lists other jobs with the same color, filtered by default to the tags of the open job, such as the season. Add one, and its samples appear in the table and the charts as diamonds, marked with the number of the job they come from. You compare a new dip with what was approved last season on the same chart, under the same light and the same formula. Approved only keeps just the approved samples of those jobs.
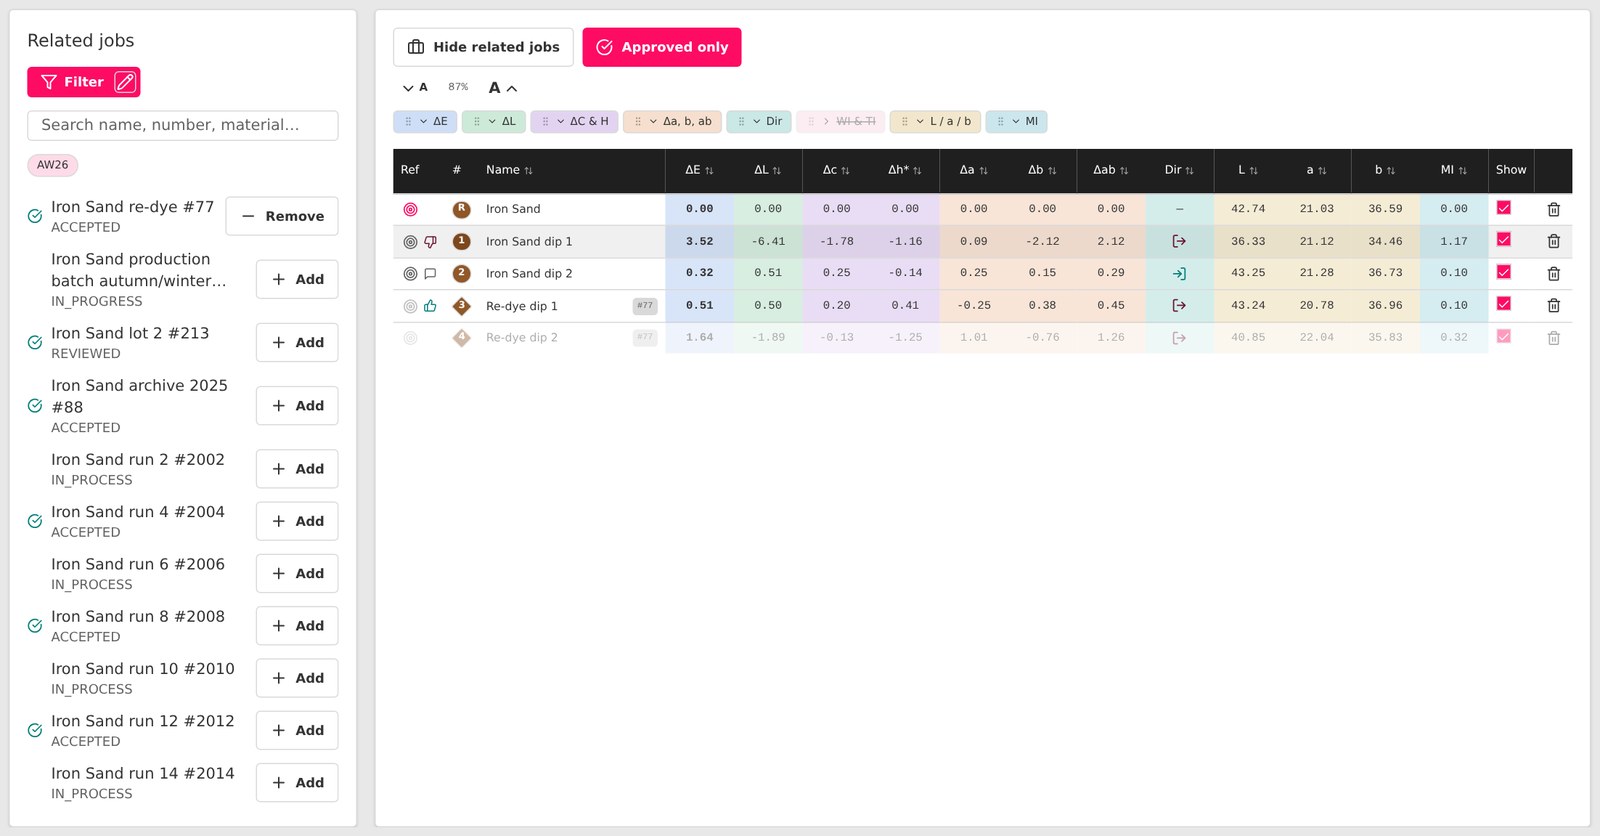
Set as reference, in the right-click menu, measures every sample against a chosen dip instead of the job's reference. That shows you how far dip 2 moved from dip 1 after the dye load changed. The row marked R stays the job's reference.
Approve where you compare
Right-click a lab dip to Validate Ok or Reject it, with an optional comment such as "Second dip, dye load reduced". The decision is saved to the job and shows as a thumb in the row.

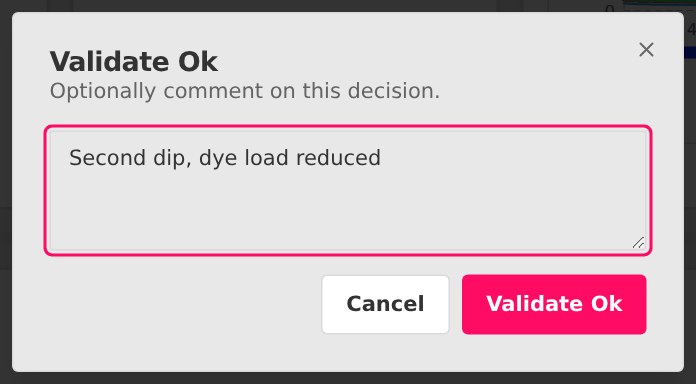
Whether you can approve depends on your role and the status of the job, and the menu tells you when you cannot.
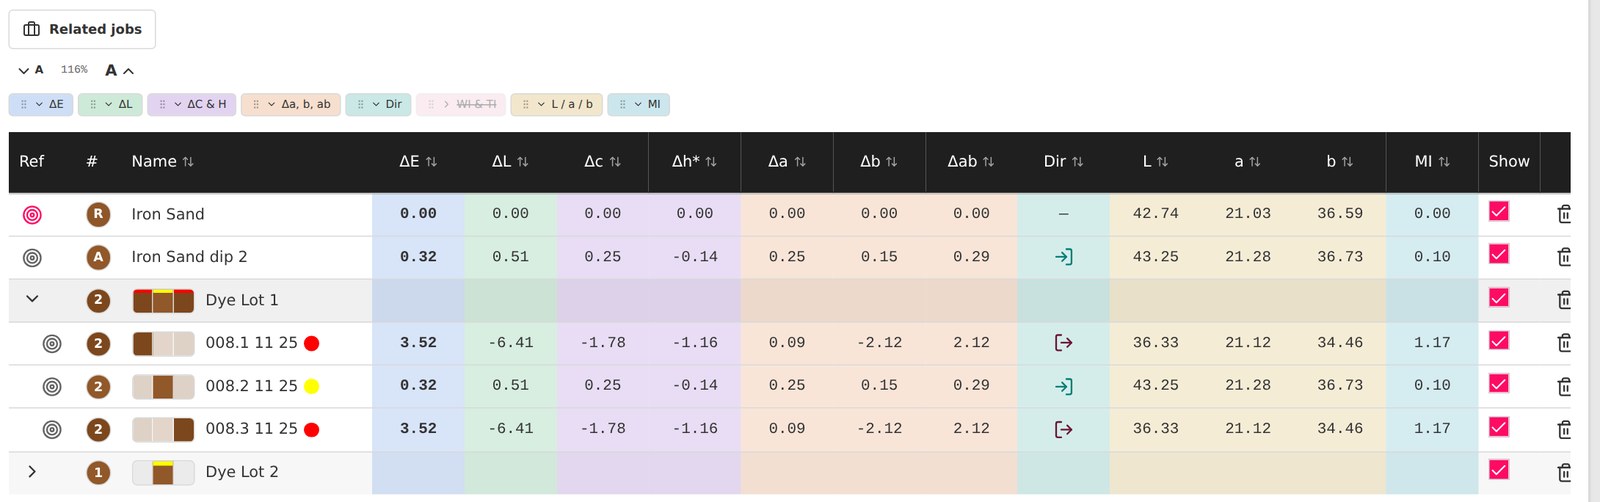
For BulkControl jobs, the comparison shows the reference, the approved lab dip and one row per dyelot. Open a dyelot to see its left, center and right measurements, each with its quality gate: green, yellow, or outside both. The yellow gate is drawn behind the green one in every chart and in the 3D view.
One standard, one tolerance with a direction, and everyone reading the same chart: that is how an approval decision arrives at the dye house the way it was made.
See it live on November 10
We demonstrate the new comparison in a 45-minute live webinar, step by step, with time for your questions. Two sessions, same content:
- Morning session: Tuesday, November 10, 2026, 9:00 AM CET. Register for the morning session
- Afternoon session: Tuesday, November 10, 2026, 4:00 PM CET (10:00 AM ET, 7:00 AM PT). Register for the afternoon session
Next steps
- Already working in MatchBox? Open a lab dip job and click Open DeltaE comparison (new) in the job detail panel.
- New to DMIx? See how MatchBox handles spectral approval against the standard and how BulkControl checks dyelots in production, or book a demo.
Frequently asked questions
- Does the new Delta E comparison replace the previous one?
- Both open from the job detail panel. The green crosshair labeled Open DeltaE comparison (new) opens the new comparison, the crosshair next to it opens the previous one. You choose per job which one you use.
- Does changing the tolerance in the comparison change the job?
- No. Limits you type in the Tolerance panel last while the comparison is open and show you what would pass under them. The arrow next to the panel title brings back the job's own limits.
- Which Delta E formulas does the comparison support?
- CIE76, CIE94, CIEDE2000, CMC 1:1, CMC 2:1 and weighted variants. The job's tolerance profile sets the default, and you can switch the formula, the observer and both illuminants in the bar above the charts.